Teilen
E-Mail
Last Updated April 9, 2024
Artikel
Secure Erase SSDs with Solidigm™ Tools
Perform a Secure Erase SSDs
Summary
Steps to perform a Secure Erase using:
- Solidigm™ Storage Tool (SST)
- Solidigm Synergy™ Toolkit (Toolkit)
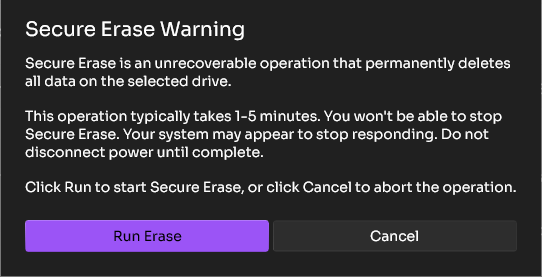
| WARNING | Secure Erase will remove all user data from the drive! |
| NOTE | The Secure Erase functionality is compatible on the following operating systems if the conditions below are true. Compatible operating systems:
Supported conditions:
|
Resolution
Solidigm Synergy™ Toolkit
Download: Solidigm Synergy™ ToolkitThe Secure Erase, through Toolkit, is only compatible with NVMe* SSDs.
SATA SSDs cannot be Secure Erased unless using Windows* 7.
Toolkit GUI
|
 |
 |
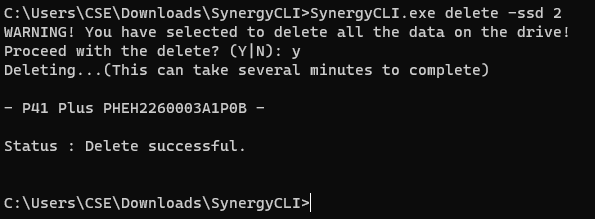
Toolkit CLI
|
 |
Solidigm™ Storage Tool
Download: Solidigm™ Storage Tool
SST in Linux* can secure erase both NVMe* and SATA SSDs.
Windows* can only secure erase NVMe* SSDs, unless using Windows* 7 (which can also do SATA).
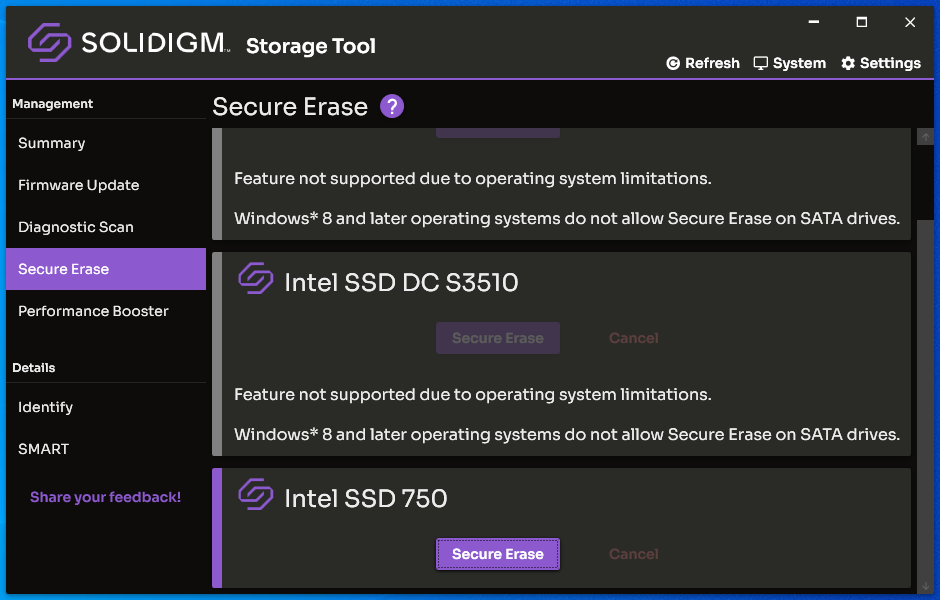
SST GUI
|
 |
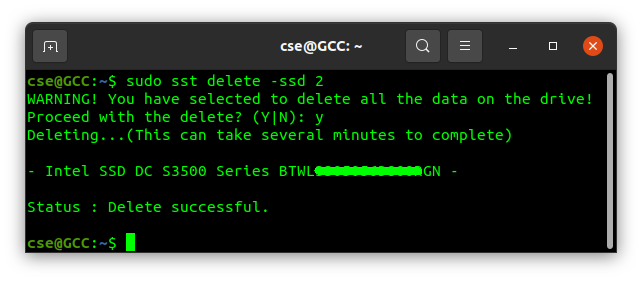
SST CLI
|
 |
Questions? Check out our Community Forum for help.
Issues? Contact Solidigm™ Customer Support:
[Chinese] [English] [German] [Japanese] [Korean]
Teilen
E-Mail